
My hood hinges bind, or the hinge arm bolts keep breaking
Hood Hinges
Binding is the root cause behind almost every broken hood hinge arm or snapped bolt we see, and binding almost always traces back to one adjustment.
Overview
Short Answer
The most common cause of hinge binding is improper orientation of the cam buttons. Broken arm bolts are usually the downstream result of that binding rather than a problem with the bolt.
Start with the cam buttons
Our billet hood hinges use cam buttons to set how the hinge travels. Installed in the wrong orientation, the hinge fights itself through part of its arc, and every open and close puts load into the arm and its hardware until something gives.
The rule is that the front and rear buttons on each side need to point in the same direction, and the two sides need to match each other. Buttons that disagree leave the hinges slightly twisted, which puts extra pressure into the hinge every time the hood moves.
Your kit includes a cam button reference sheet, and page 2 of the Universal Hood Hinge Install Instructions covers the same thing. If you cannot find your copy, email us your order number and we will send another.
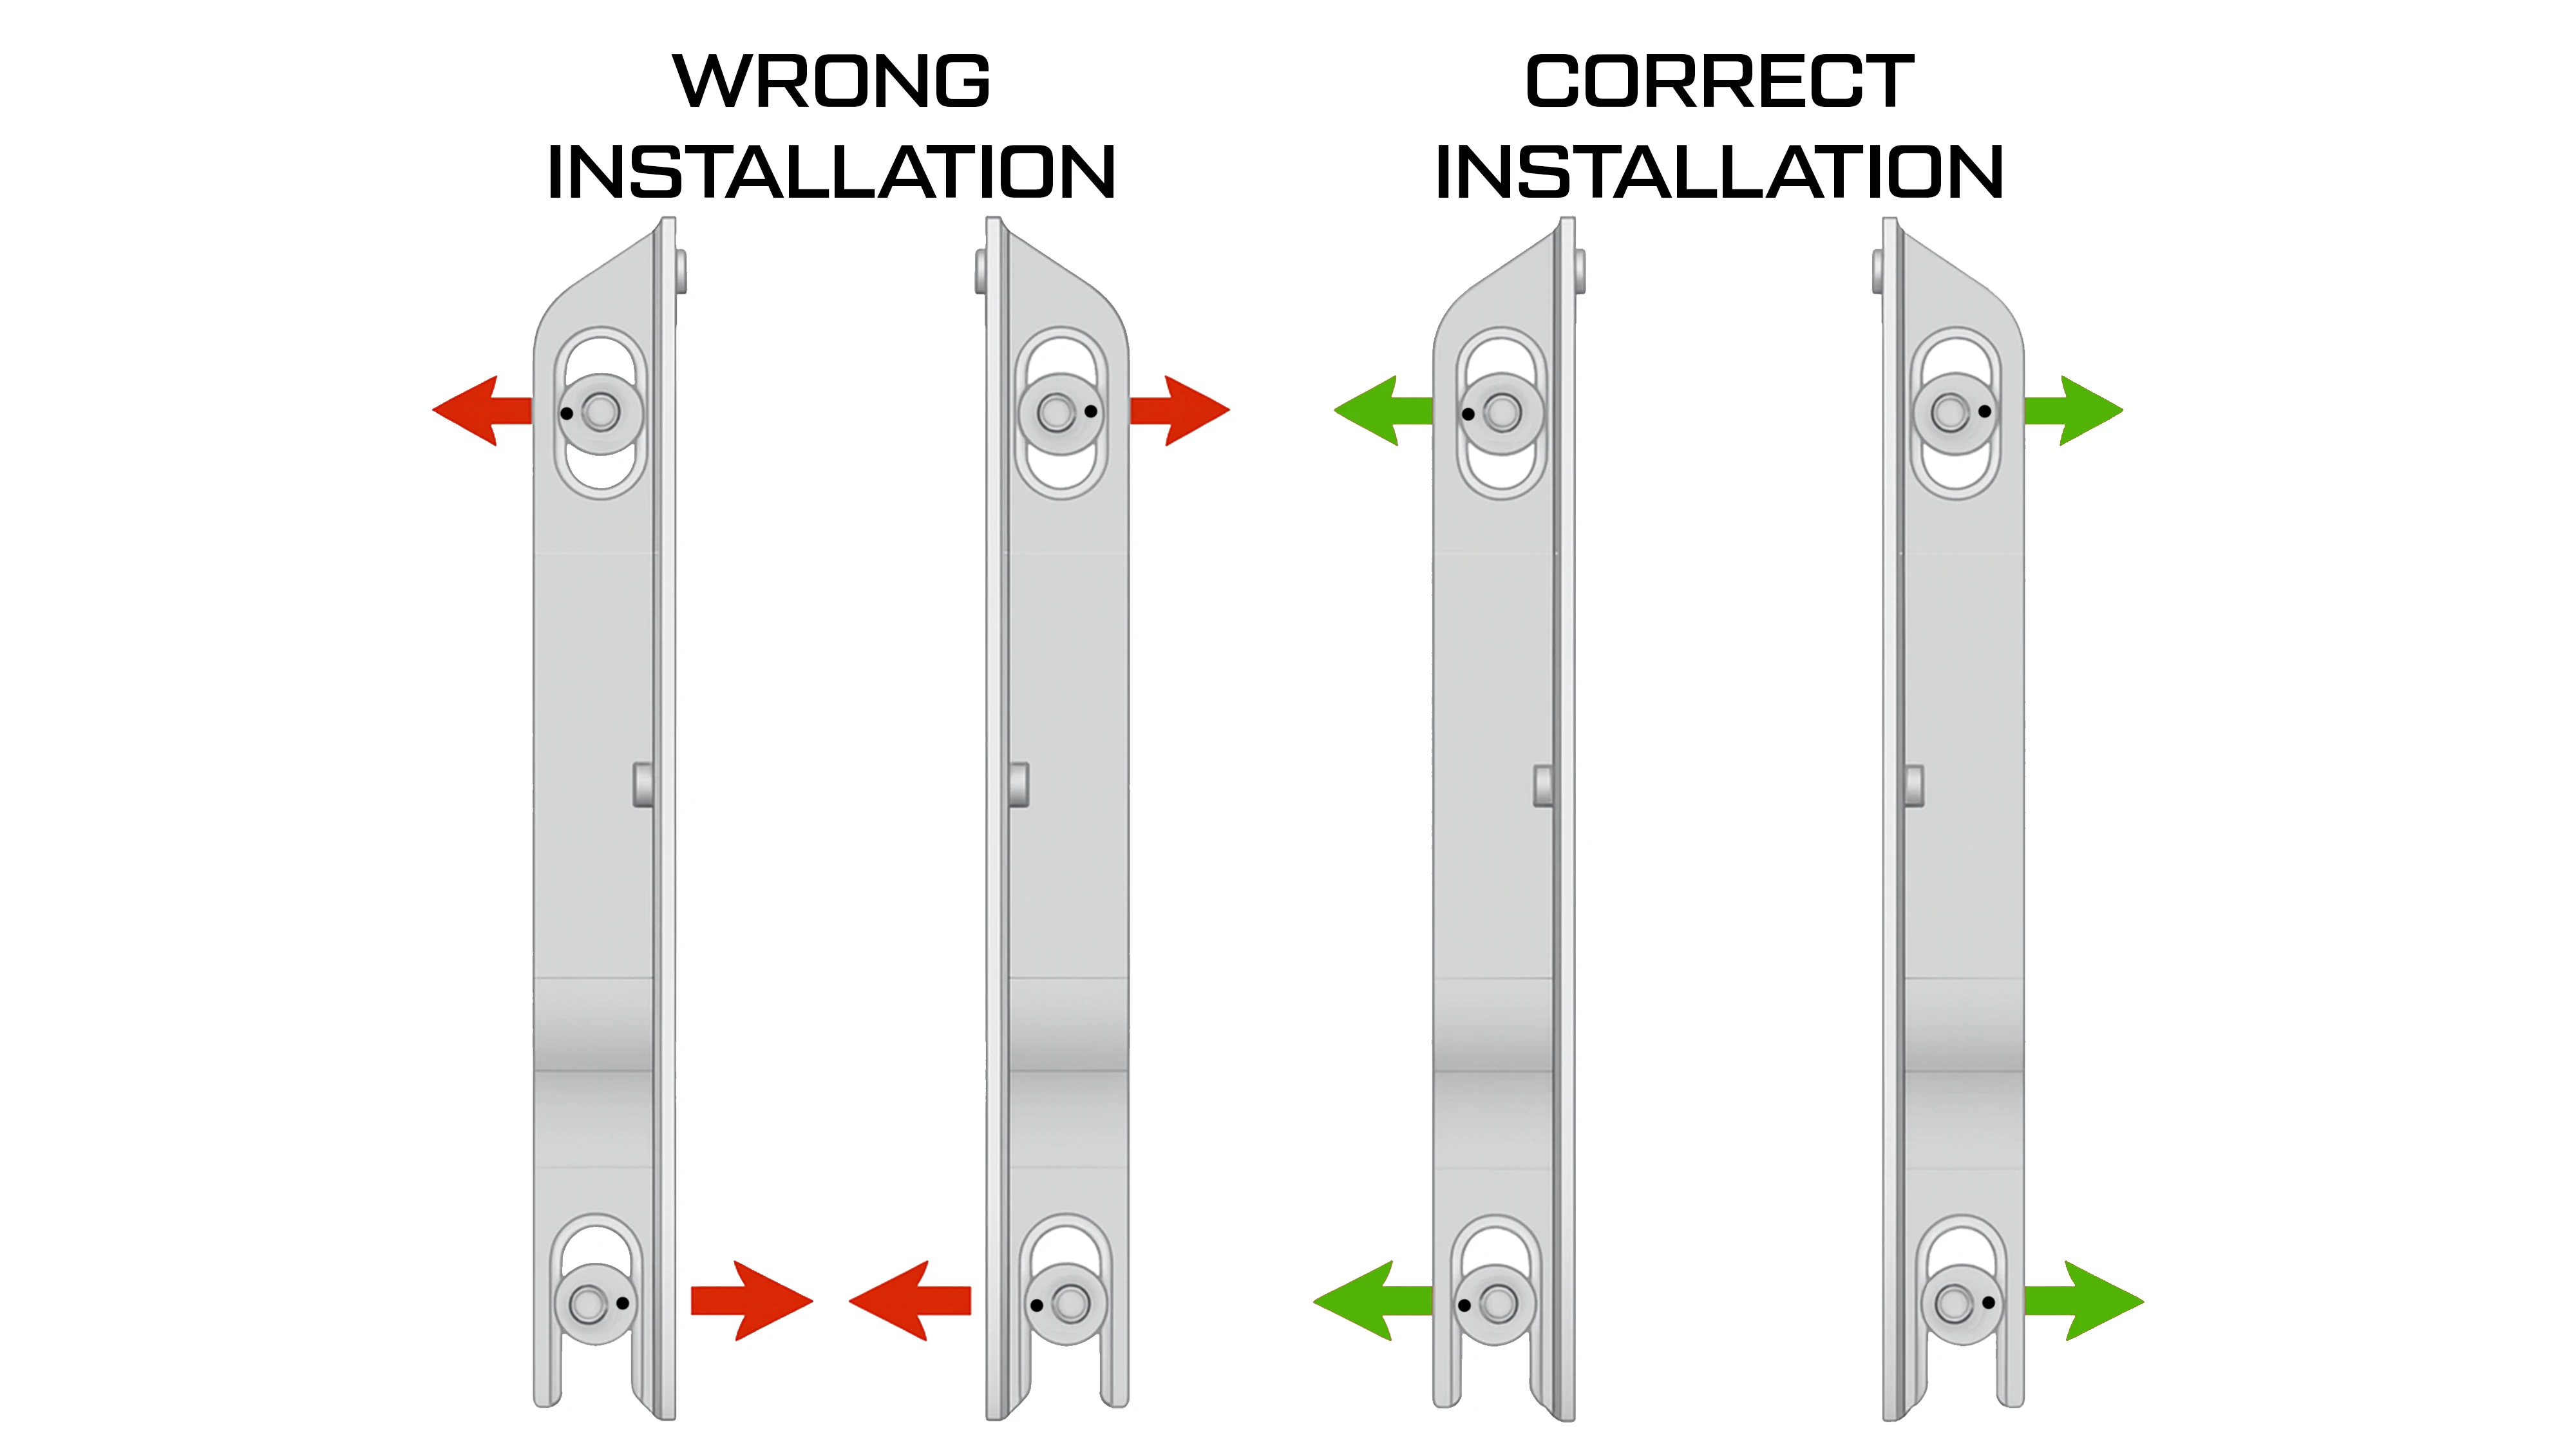
Cam buttons have to run parallel. One angled in and one angled out is the most common cause of binding.
Struts bottoming out
If the hood feels like it binds before it is fully closed, the gas struts may be bottoming out rather than the hinge binding. Forcing the hood shut from there can damage both the struts and the hinges, so stop and work through this instead.
- Remove the core support spring if it has not already been taken out.
- Shift the hood forward slightly with the cam buttons to relieve the pressure.
- If it still does it, you may need struts with a different pressure rating.
Describe the symptom precisely
“They don’t fit right” covers three different problems, and each points somewhere different. Tell us which one you have:
- Binding. The hinge is stiff or fights you through part of its travel.
- Not lining up with the hood bolt holes. A mounting or adjustment problem.
- Not opening fully. Travel or cam button orientation.
If it is the turnbuckle bolts bending
Bent turnbuckle bolts have three causes worth checking, and only one of them is the bolt itself:
Loose pivots. Torque the main pivot bolts on both hinges to 38 ft/lbs. Loose pivots put extra load on the turnbuckle bolts and can bend them.
A heavier hood than stock. A cowl hood or an added scoop loads the hardware more than the original steel hood did. Tell us what hood you are running.
Hardware substitution. If the bolts were replaced with ones from a hardware store, the grade matters here. Use the hardware we supply.
Mismatched adjustment rods
Check that both adjustment rods are set to the same length. If they are not, the two hinges do not share the load evenly, and one ends up carrying more than it was built for every time the hood moves.
That is what is behind the more serious failures we see: bolts pulling through, threads stripping at the mounting points, adjustment rods shearing, and brackets breaking. Measure both, set them equal, and use the preset spec for your kit as the baseline if you have it.
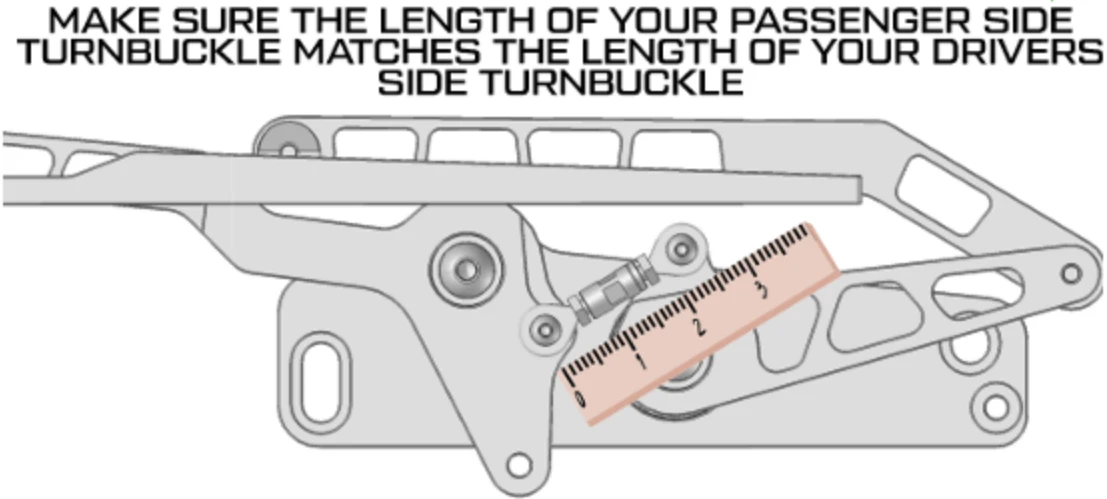
Measure both turnbuckles. The passenger side has to match the driver side.
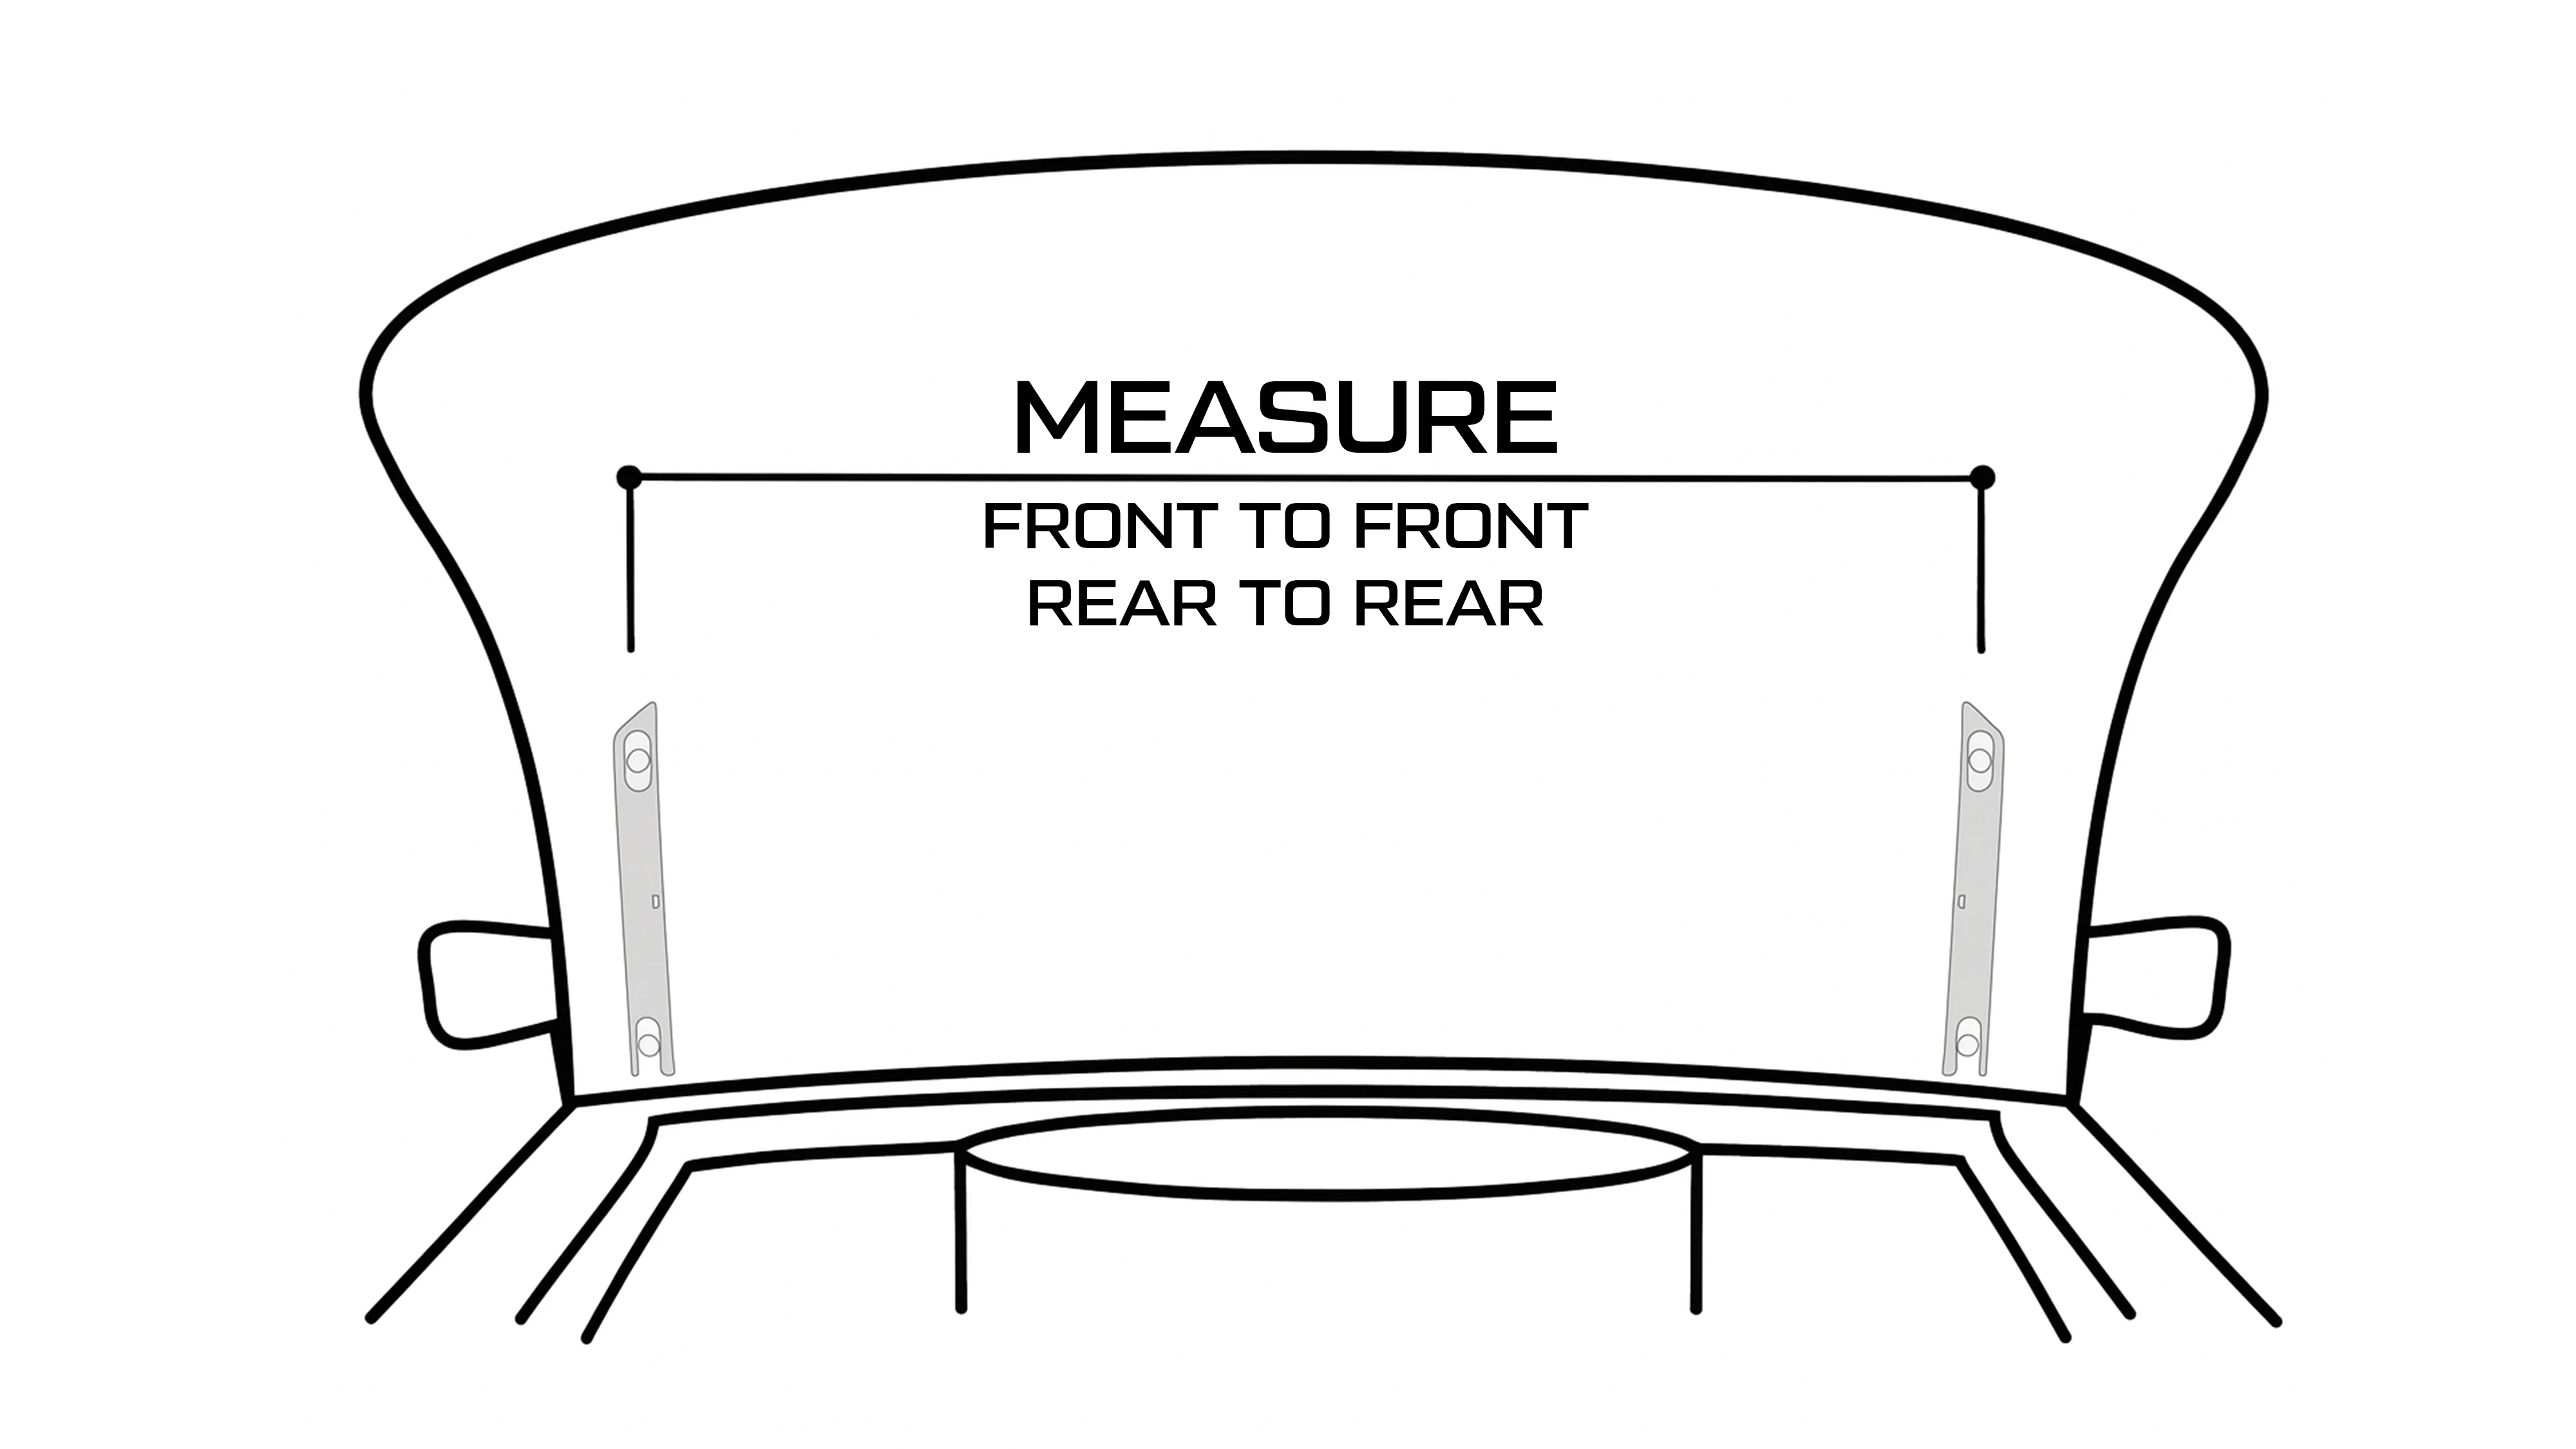
While you are measuring, check the hinges front to front and rear to rear. Hinges toed in or out will bind through the arc.
Photos we need
the adjustments on the driver side
the underside of the hood, so we can see the position of the cam buttons
any broken hardware, close up
Once we have those we can confirm what caused the failure and get replacement parts to you.
The adjustment side of this
Binding is an adjustment problem, so read our article on adjusting your hinges alongside this one. The full procedure with photos is in the Universal Hood Hinge Install Instructions.
Don’t force it
If the hood is binding, stop cycling it. Each cycle works the hardware further, and a hinge that lets go with the hood up can damage the hood and the fender.
Watch it on video
Seeing the adjustments made on a real car is usually faster than reading about them.
CVF Hood Hinge Installation Tips — CVF Racing on YouTube
Why Billet Hood Hinges Are a Must — 1966 Chevelle Install and Setup Tips — CVF Racing on YouTube
Still need help? Our tech support team can get you pointed in the right direction.
Contact Support