
How Do I Install CVF Hood Hinges?
Hood Hinges
A full install, from photographing your panel gaps through to the final torque. The adjustment steps at the end are the ones that take the time, and they are meant to be repeated.
Overview
Short Answer
Photograph your gaps and tape your edges first. Hang everything loose, set the turnbuckles equal and the height adjustment mid range, then get the hood on and ease it down slowly to find your contact points. Side to side comes first, then height, then torque everything. Every adjustment gets made on both sides.
Before anything comes apart
Take photos or video of your panel gaps. When it is time to dial the adjustments in, that is what tells you what you are aiming for, and it is very hard to reconstruct from memory once the hood is off.
Put a couple of layers of tape along the edges of the hood and the fenders. You will be easing the hood down over and over to check your progress, and tape is what keeps those checks from chipping paint.
This is easier with two people. Every check involves lowering the hood to see where it lands, and a second set of hands makes that safer and faster. On your own, take it in very small steps.
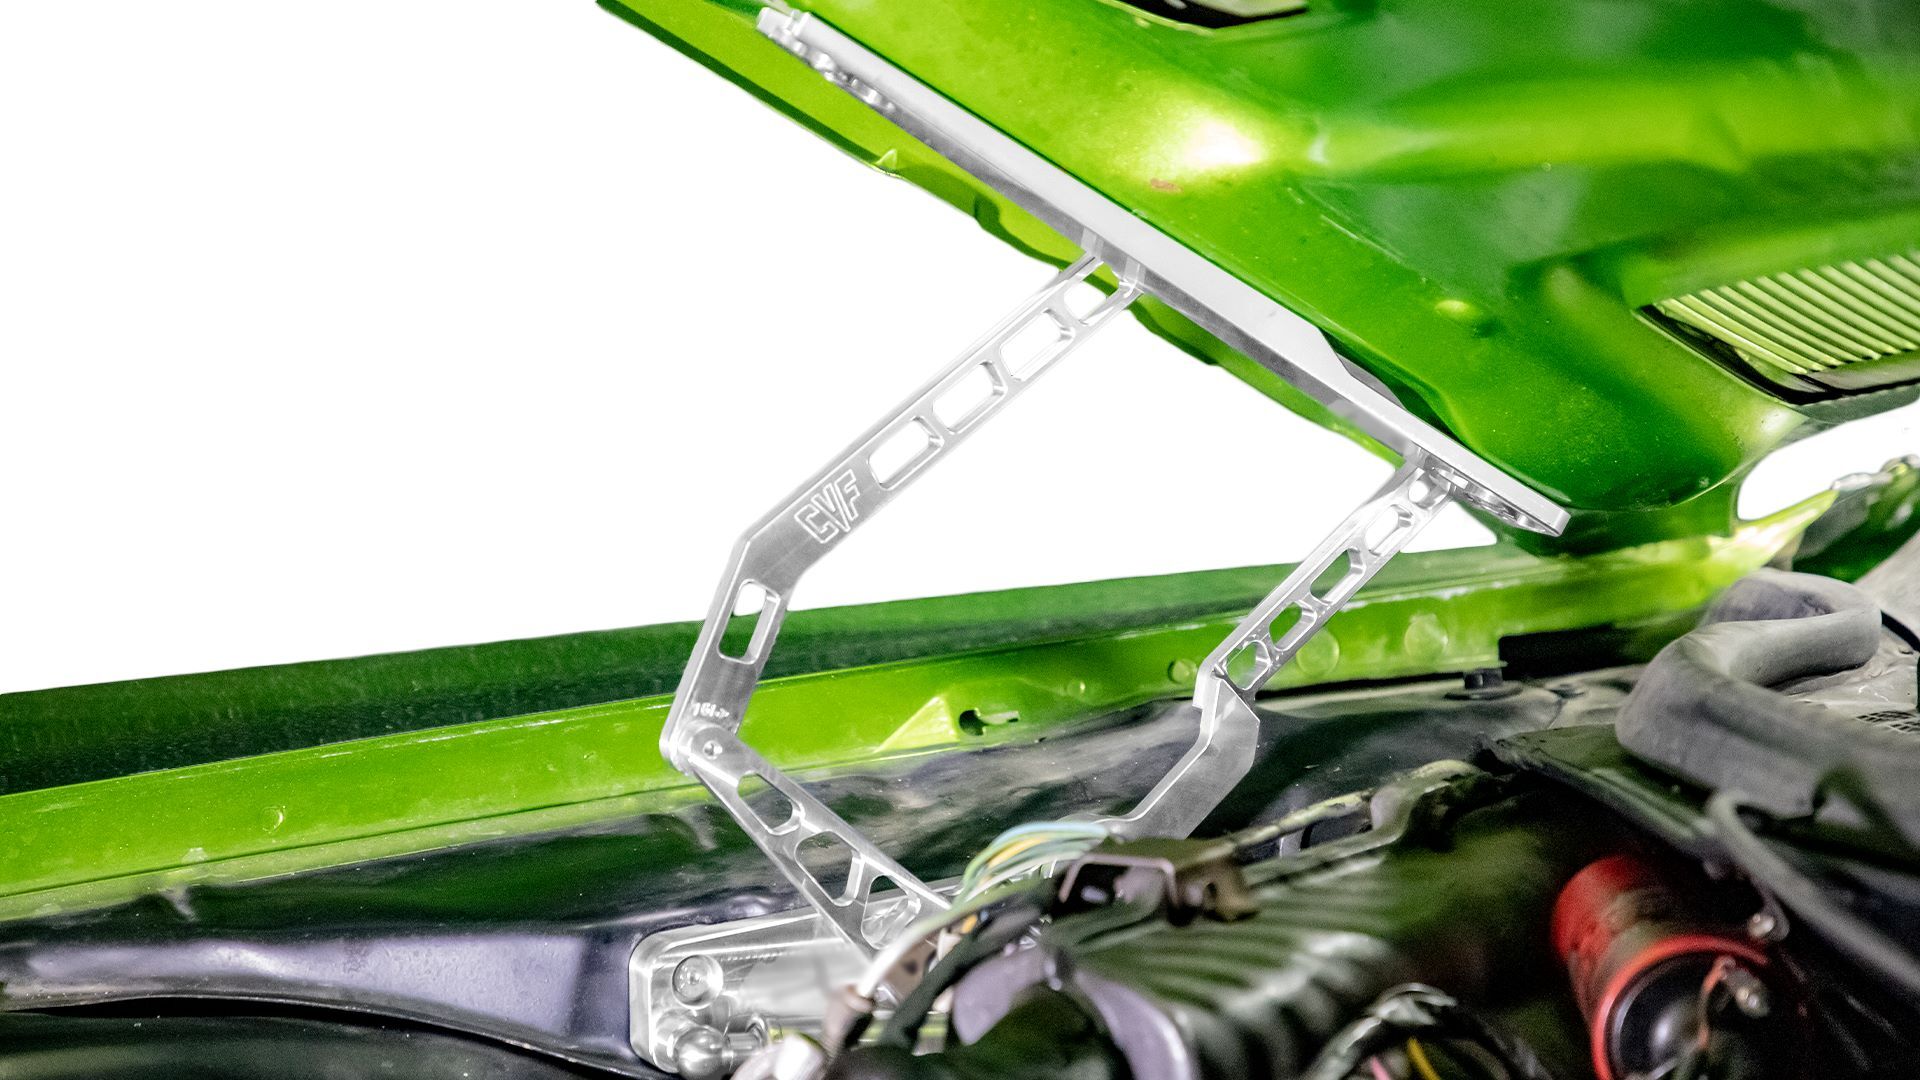
A finished install. Everything below is how you get here.
Removing the hood and the old hinges
Carefully remove the hood and set it somewhere safe where it will not get scratched or damaged.
Unbolt the original hinges from the inner fender and set them aside. Worn factory hinges are usually visibly sloppy once they are off the car, which is a good reminder of what you are replacing.
Installing the new hinges
Everything in this stage goes on snug, not tight. You need the wiggle room later.
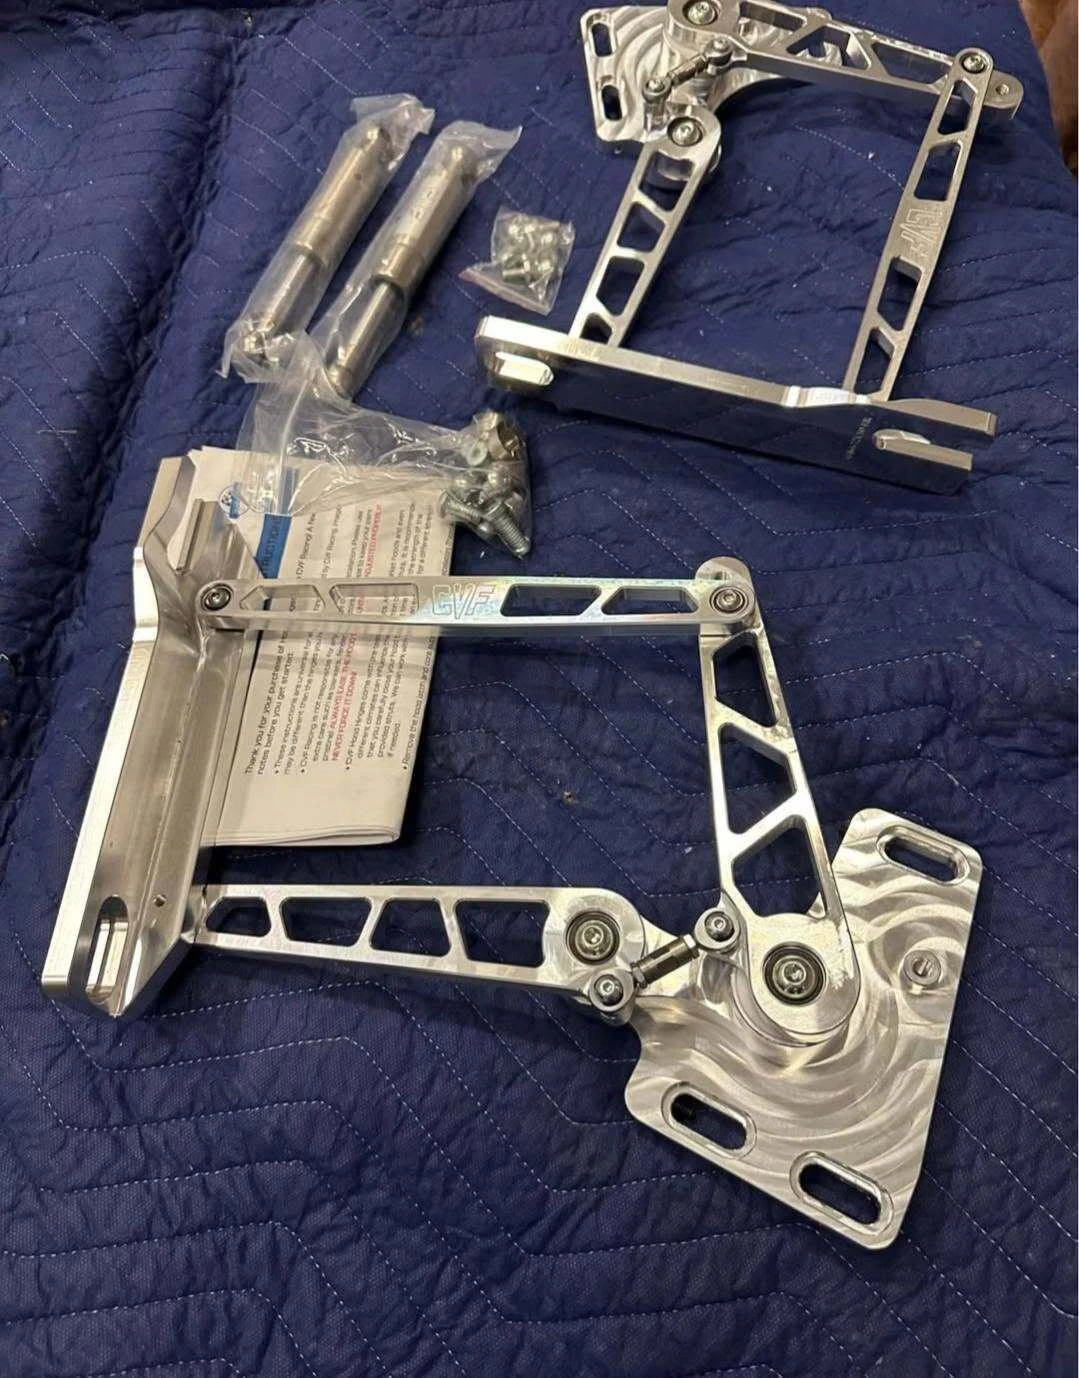
What you should have in front of you: both hinges, the gas struts, the hardware and the instruction sheet.
Check the turnbuckles first. Before the hinges go on, confirm both turnbuckles are close to the same length as each other.
Install the hinges with the supplied hardware. Snug them up but do not torque them down yet.
Loosely install the cam buttons into the front bolt hole of the hood. These are what capture the hinge arms when the hood slides back into place.
Install the ball studs onto the hinges and slide the gas struts into position. Do not forget the retaining clip. It is what locks the strut in place and keeps it secure.
Set the hinge height adjustment to the middle of its range. That is the best starting point, because it leaves you room to move up or down later.
Check the hinges are not toed in or out
With both hinges mounted, measure across the car from one hinge to the other at the front, then again at the rear. Those two numbers should match.
If the front measurement is tighter than the rear the hinges are toed in, and if it is wider they are toed out. Either way the hood will fight you through its arc no matter how much you chase the cam buttons afterwards, so get this square before the hood goes back on.
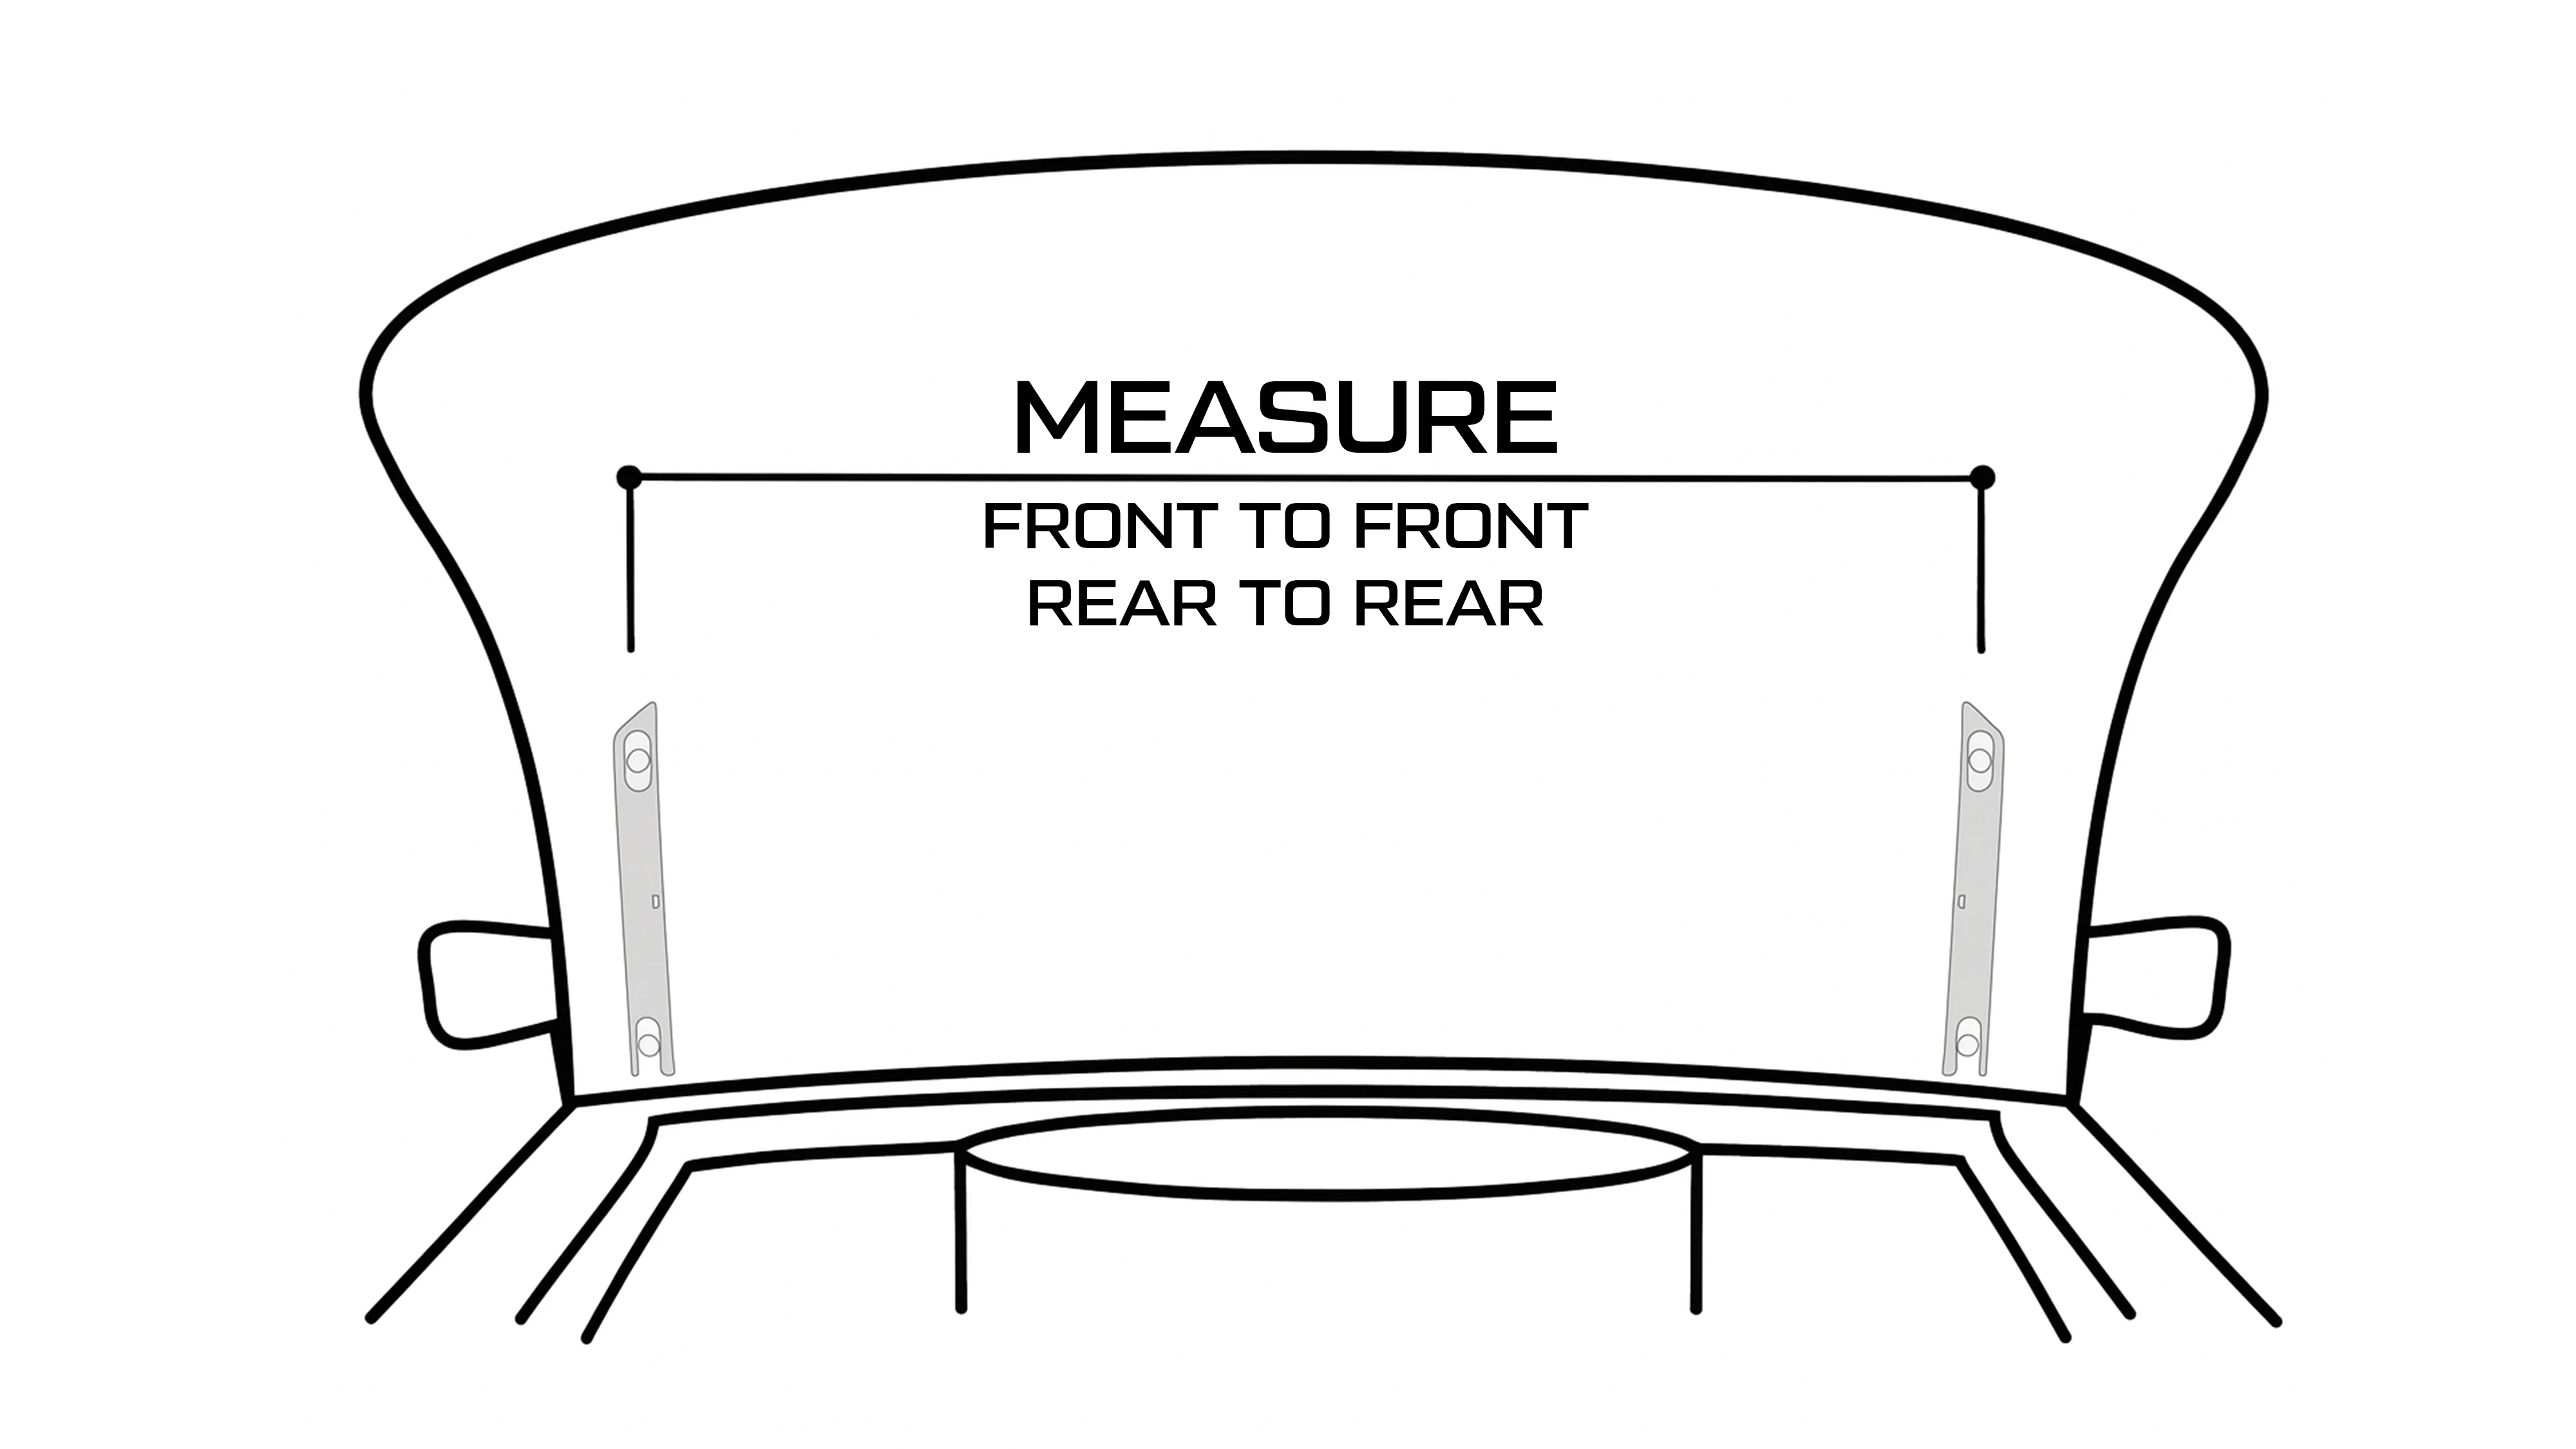
Measure front to front and rear to rear. The two should match.
Getting the hood back on
Slide the hinge arms around the cam buttons you installed earlier. That holds the hood while you get the rest of the hardware in.
Fasten the hood with the supplied bolts and the cam buttons. Again, do not fully tighten. You need room to adjust.
Start with the bolts near the middle of their slots. Be extra careful here if you are running a header panel or a taller cowl hood. A hood too far forward or too far back is how paint chips and panels get damaged.
The first close
Lower the hood very slowly, and watch every edge as you go. Check the fenders, the header panel and the cowl. If you see contact anywhere, stop immediately.
What you are trying to get to here is the hood positioned correctly front to back and parallel to the fenders. You will almost certainly do this more than once, because each adjustment that follows changes it again. That is normal, not a sign anything is wrong.
Side to side comes first
Start with side to side, and make it with the cam buttons. The part that catches people is the direction: the cam moves the hood the opposite way to the way you rotate it. To move the hood toward the driver side, rotate the cam so the hex hole faces toward the passenger side.
On the first side you adjust, there is a good chance the hinge moves and the hood does not. That is the hinge being put into a bind, not the adjustment failing. Go and make the same adjustment on the other side and the hood will move.
Whatever you end up with, the cam buttons at the front and rear of each hinge have to end up parallel to each other, and both sides have to match. Buttons that disagree make the hinge track unevenly and put stress into the turnbuckle.
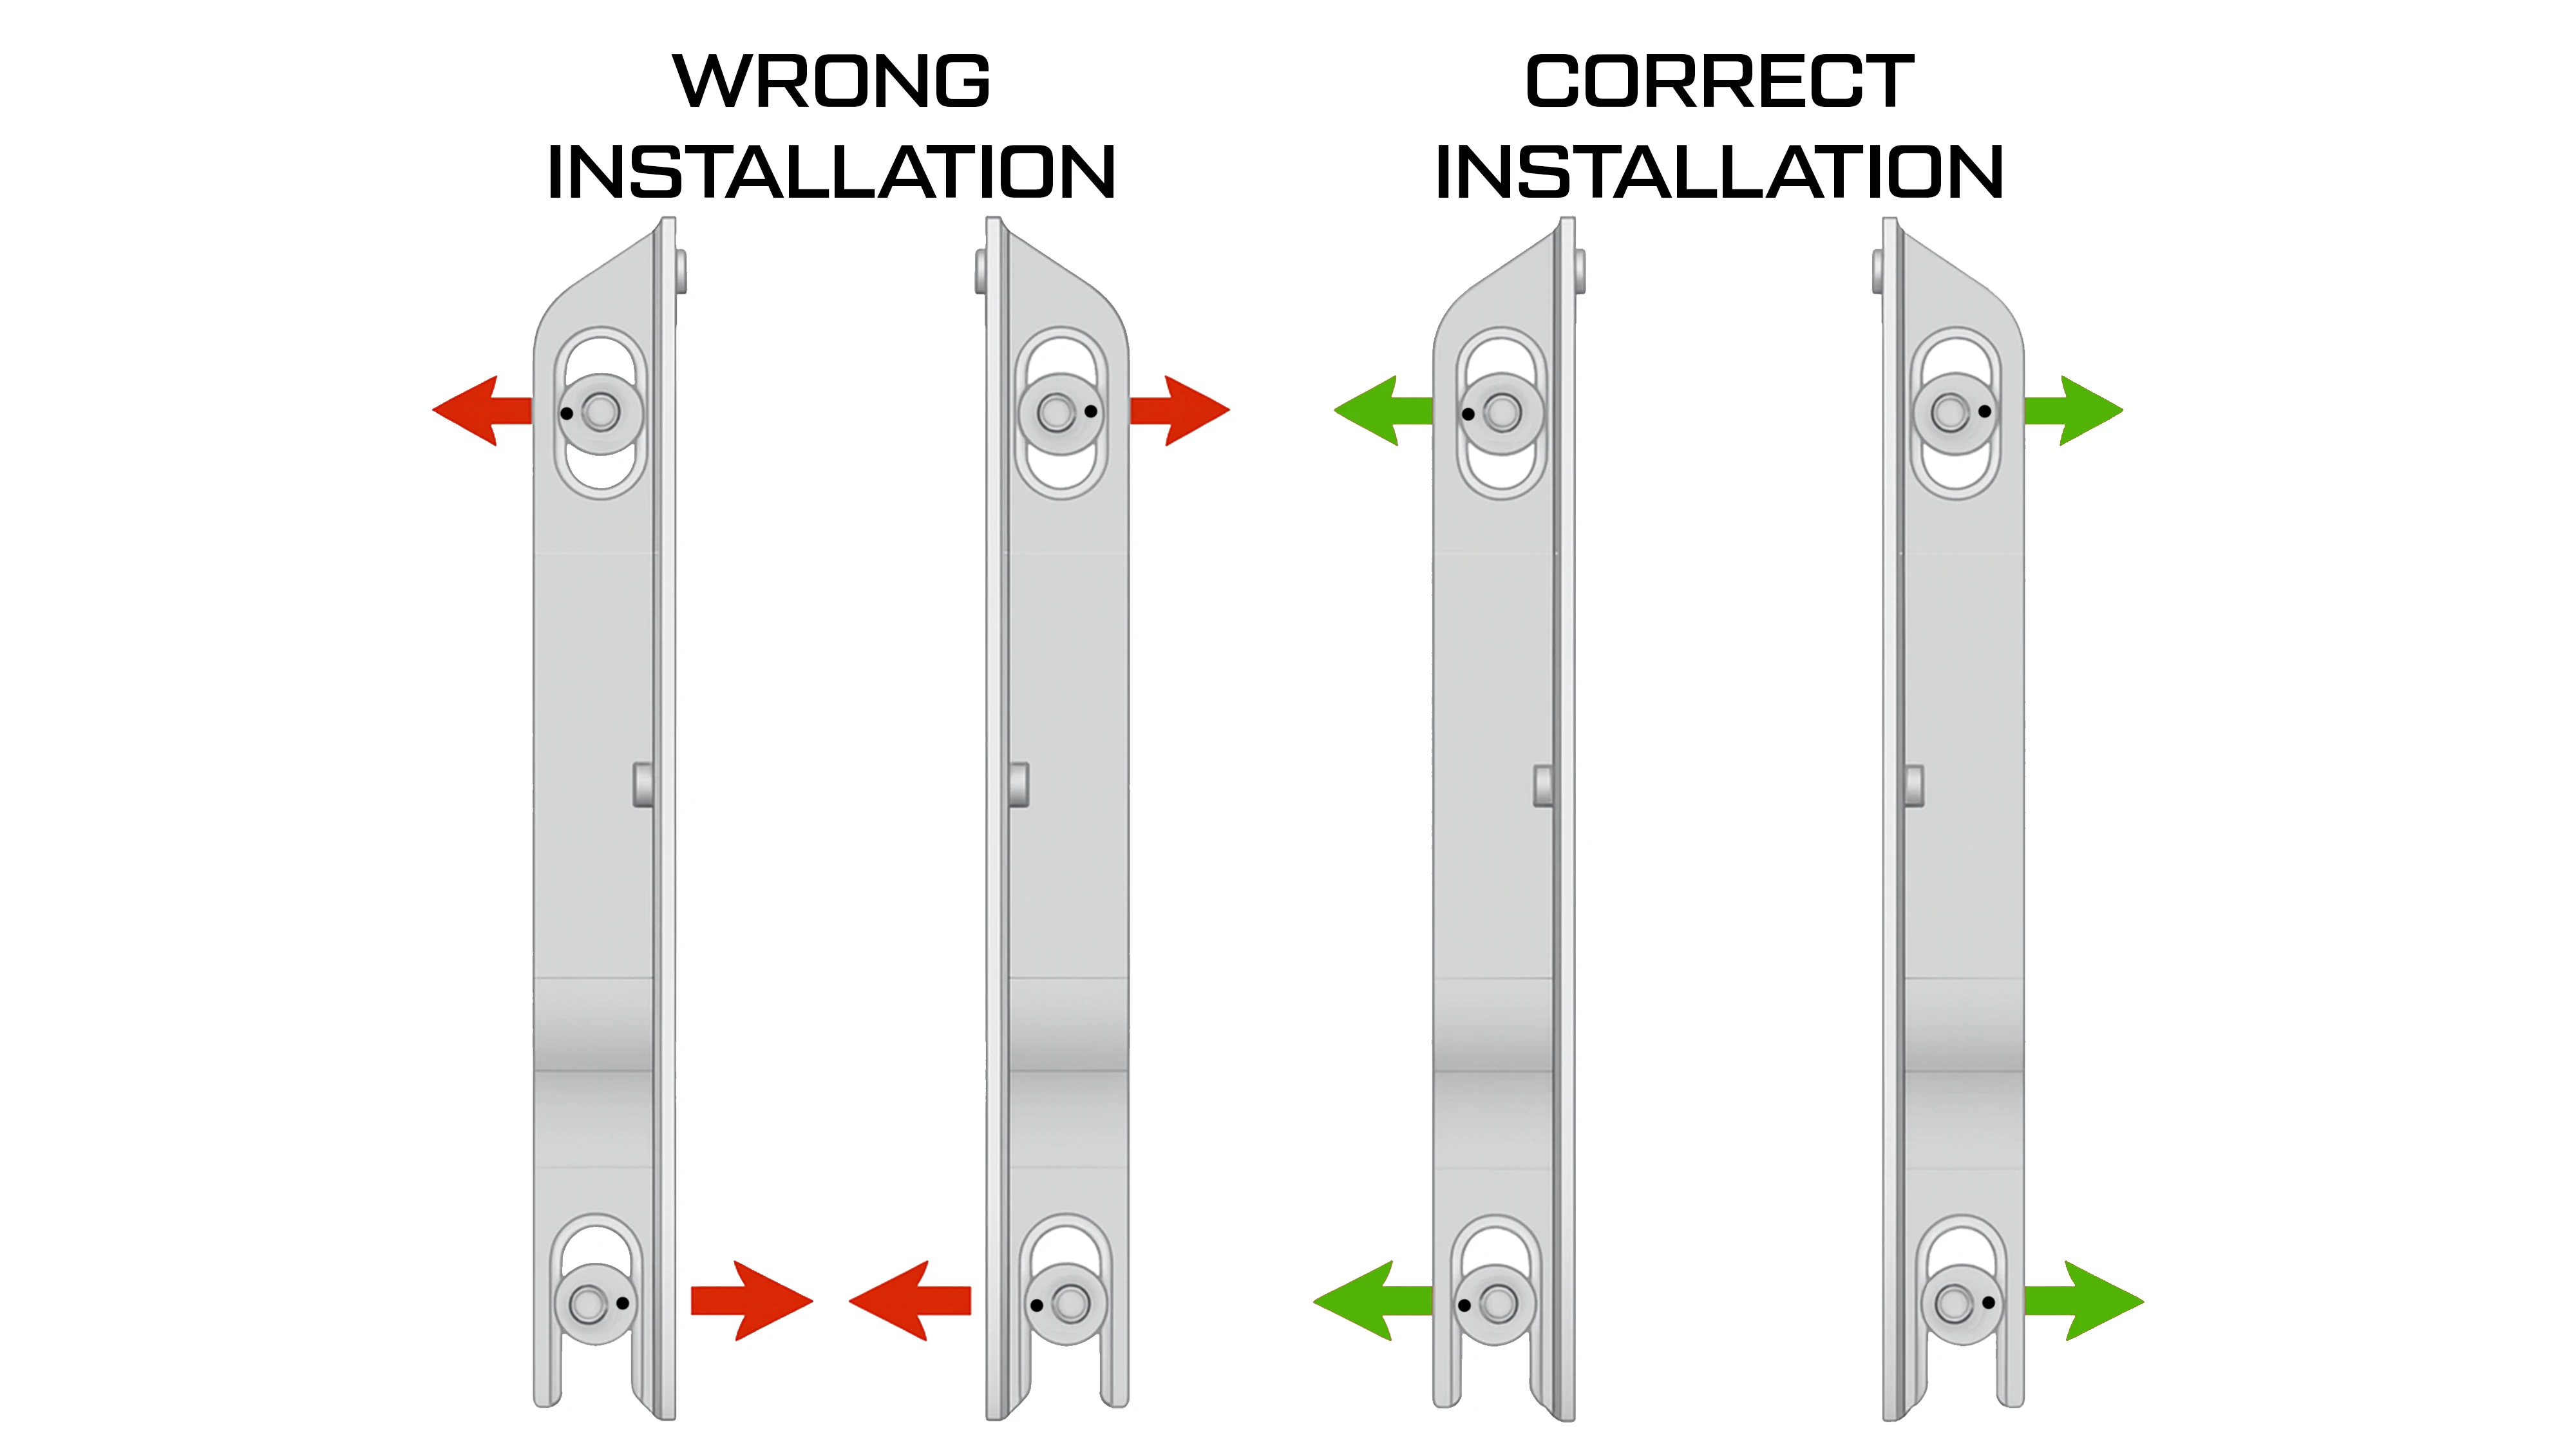
Cam buttons have to run parallel. One angled in and one angled out is the most common cause of binding and broken bolts.
Then height and the rear corner
Once the side gaps are right, move to height. Use the adjustment rods to raise or lower the hinge.
To square up a rear corner that is sitting high, lower the back of the hinge and raise the front. That small change is usually what brings the rear into alignment, and it is often easier to control than chasing the same correction on the turnbuckle alone.
When the gaps are where you want them, torque down all of the hardware.
Four more things that go wrong
Beyond cam button orientation, these are the ones we see most, and all of them are easier to catch now than after something breaks.
- Uneven adjustments side to side. Adjusting one hinge on its own throws the hood out of square and loads one side more than the other. Every adjustment gets made equally on both sides, in small increments.
- Hinge alignment. The distance between the OEM mounting holes should match your final measurement between the cam button bolts.
- Struts bottoming out. If the hood feels like it binds before it is fully closed, the struts may be bottoming out, and forcing it shut from there damages both the struts and the hinges. Remove the core support spring if it is still in, shift the hood forward slightly with the cam buttons to relieve the pressure, and if it continues you may need struts with a different pressure rating.
- Mismatched adjustment rod lengths. If the rods are not set to the same length the hinges do not share the load evenly. That is what leads to bolts pulling through, threads stripping at the mounting points, adjustment rods shearing and brackets breaking. Measure both, set them equal, and use the preset spec for your kit as the baseline if you have one. Never run mismatched rods side to side.
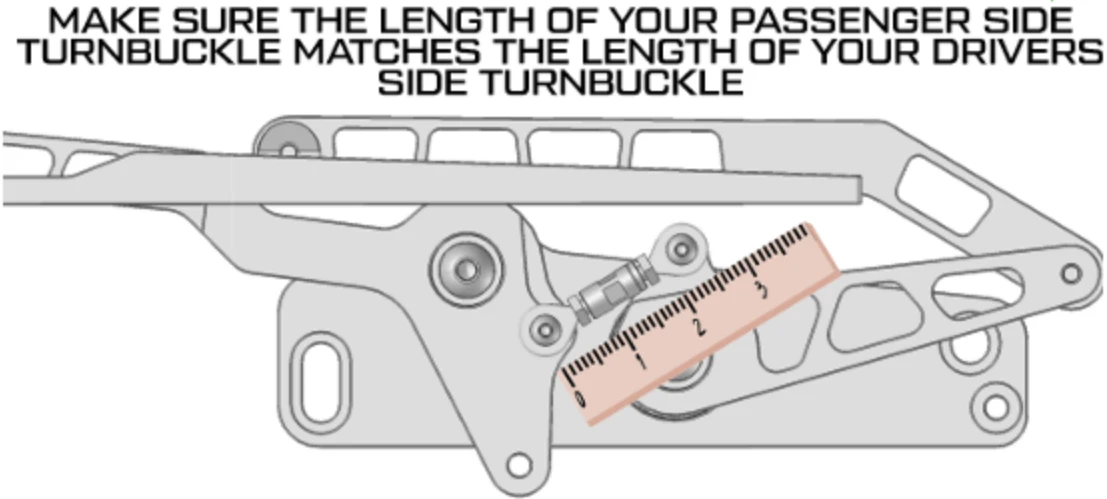
Measure both turnbuckles. The passenger side has to match the driver side.
Watch it on video
The same install on a real car, plus a set of adjustment tips.
Billet Hood Hinge Install and Setup Tips — CVF Racing on YouTube
CVF Hood Hinge Installation Tips — CVF Racing on YouTube
C10 Hood Hinge Install — CVF Racing on YouTube
Still need help? Our tech support team can get you pointed in the right direction.
Contact Support