
My hood is sitting too high
Hood Hinges
A hood that sits proud of the fenders is almost always an adjustment away from correct. Which adjustment depends on where it sits high, so start by looking carefully at that.
Overview
Short Answer
High at the back, near the windshield, usually means the turnbuckle is too long. High everywhere points to the set screws. One corner high with the bracket already at its lowest setting usually means that corner’s cam button is screwed out too far.
Find your symptom
| What you’re seeing | Most likely cause | What to adjust |
|---|---|---|
| Hood raised at the back, by the windshield | The turnbuckle is too long | Shorten the turnbuckle in small increments |
| Hood points up at the front, and the back sits below the top of the fender | The turnbuckle is too short | Lengthen the turnbuckle in small increments |
| Hood sits high or low uniformly, everywhere | Hinge height | The set screws, which move the hinge straight up and down |
| One corner sits high, and the bracket is already at its lowest setting | That corner’s cam button is adjusted too tall | Screw that cam button down |
| Hood is high on one side and correct on the other | The two sides are not set the same | Compare turnbuckle length and cam buttons side to side before changing anything |
Raised at the back is the common one
A raised hood by the windshield is most often caused by too long an adjusting rod. The turnbuckle sets the angle the hood sits at, so it has more effect on this than anything else in the kit.
It is worth knowing both ends of the range. Too short an adjusting rod and the hood will point higher at the front than it needs to for proper alignment, with the back sitting below the top of the fender. Too long an adjusting rod and the hood is jacked up too high at the back end.
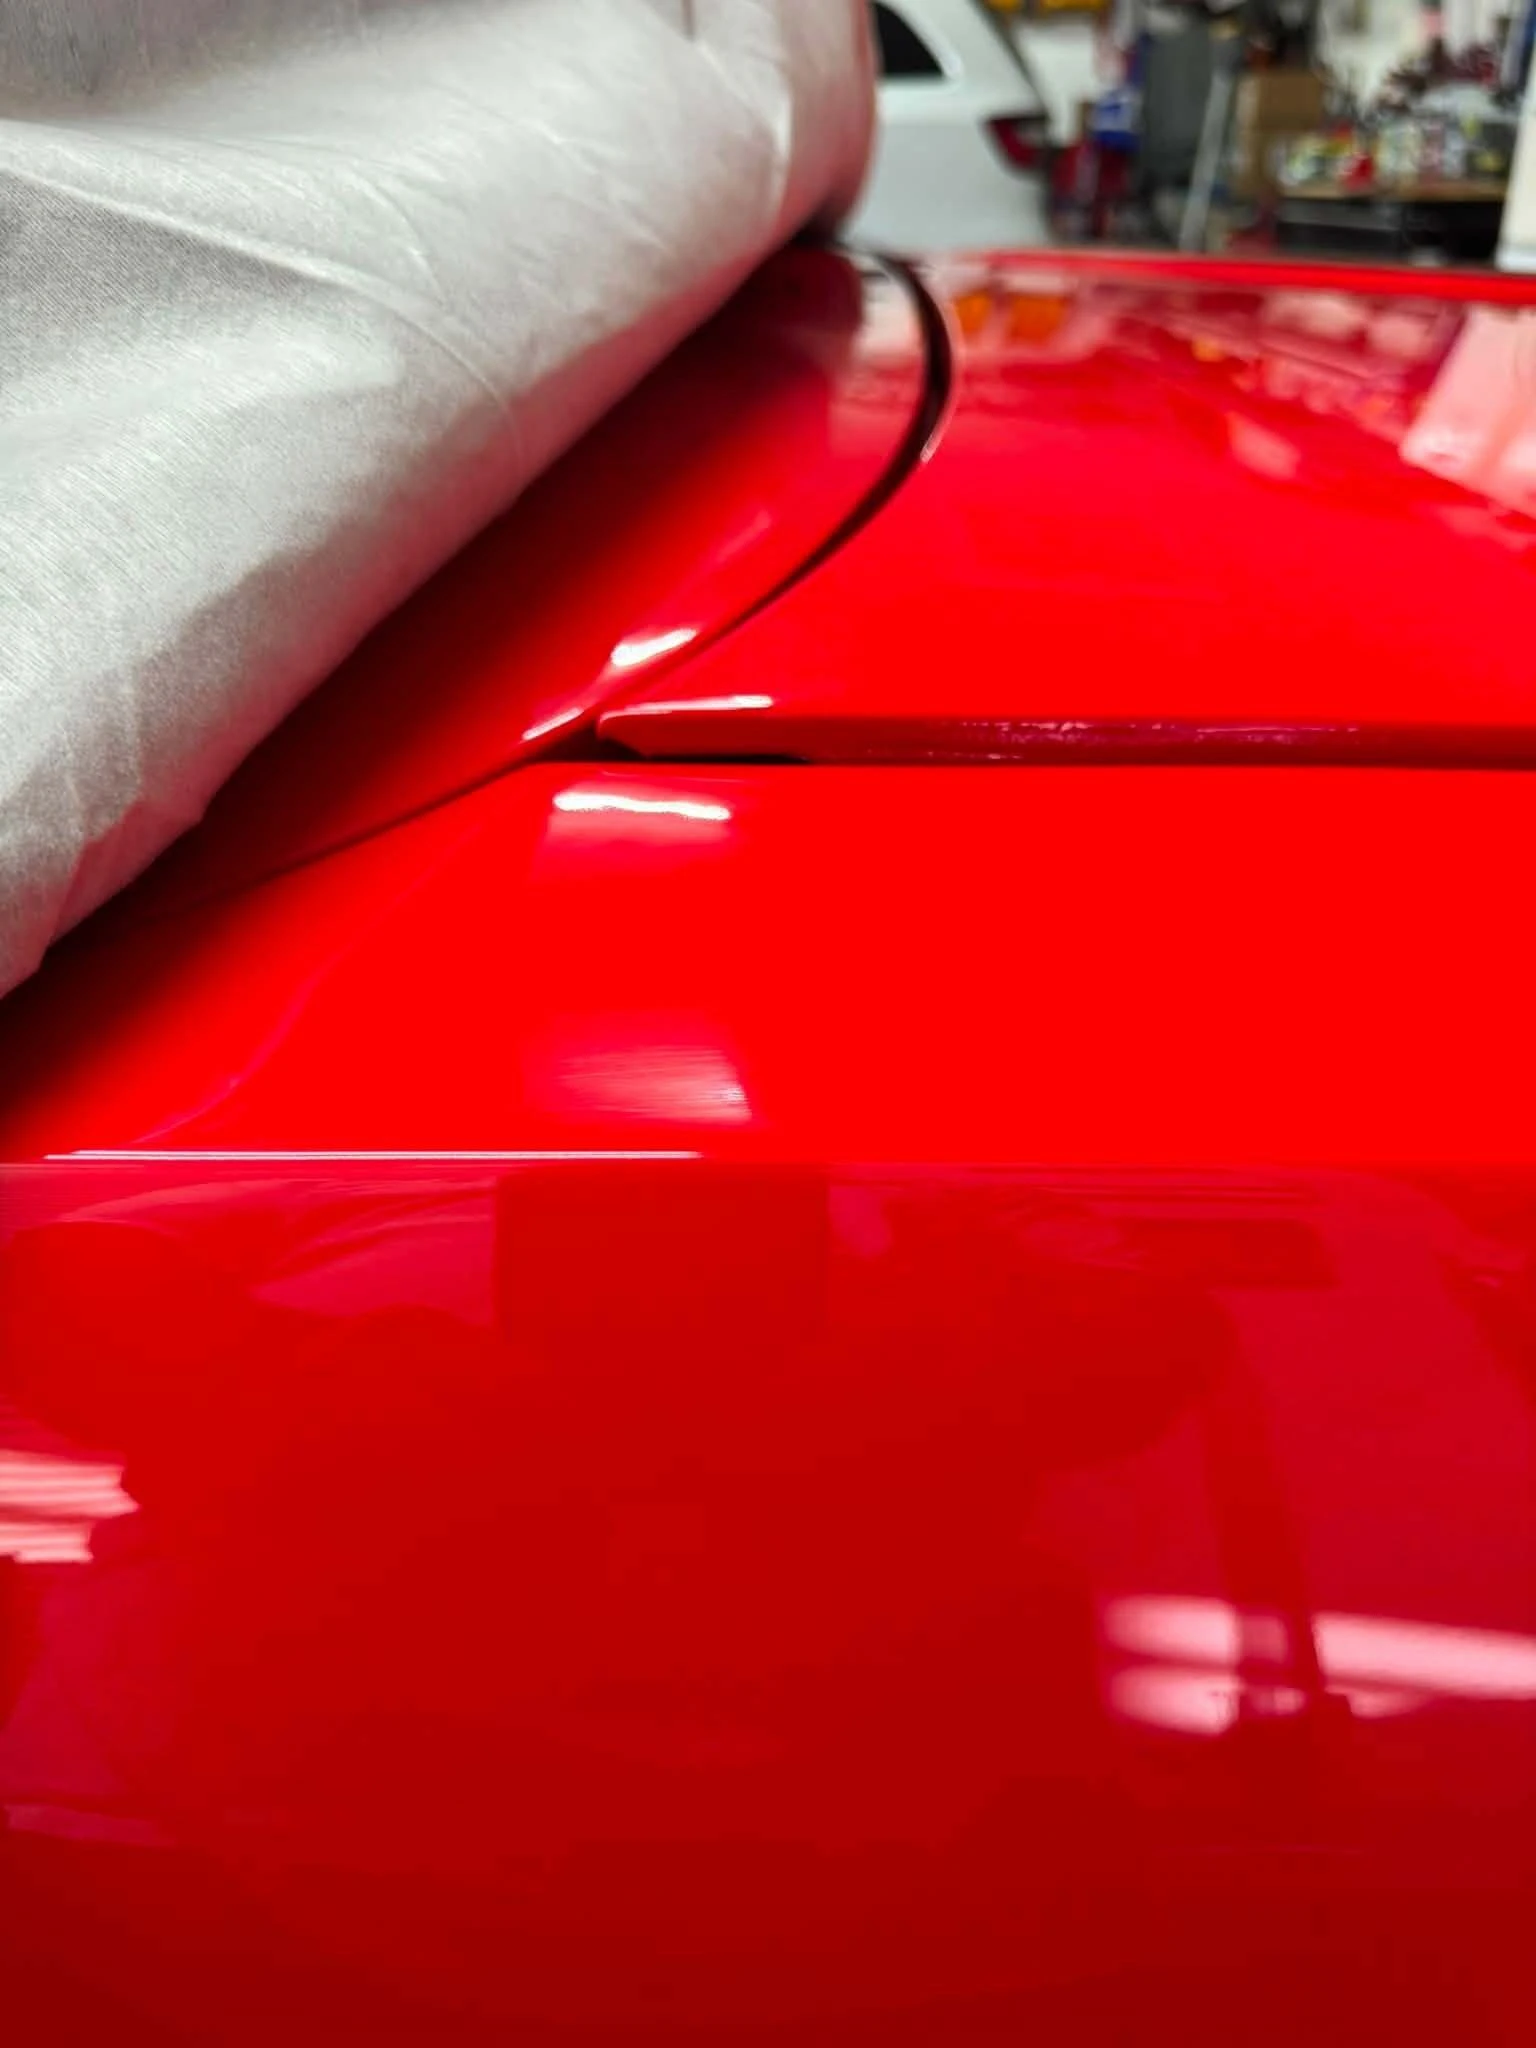
The symptom: the rear edge of the hood standing proud of the panel beside it.
Tip the front of the hinge up
The turnbuckle is not the only way to bring the back of the hood down, and it is not always the easiest one. Tipping the front of the hinge up does the same job from the other direction.
Use the height adjustment to lower the back of the hinge and raise the front. That rotates the whole hood nose down slightly and squares up the rear corner, and it is often a smaller, more controllable change than chasing it on the adjusting rod alone. In practice the fix is usually a bit of both: tip the hinge and adjust the turnbuckle, in small increments, easing the hood down to check after each one.
Whatever combination you land on, make the same change on both sides so the hood stays square.
The trap: running out of bracket and stopping there
This one is worth its own section. Both sides are set identically, the driver side is perfect, and the passenger side still stands up about an inch. The bracket is already at its lowest setting, so it looks as though there is nothing left to adjust and the only option is to modify the parts.
There is one more thing to check, and it is on the hood rather than the fender. Look at the cam button on the underside of the hood at that fender. A cam button adjusted too tall will hold the corner up even with the bracket at its lowest setting. It props the hood up from underneath, so lowering the bracket cannot overcome it. The two are working against each other.
Screw that button down and re check. In most cases that is the whole answer.
Before you cut or drill anything
Please write in first. Once a hinge has been cut or drilled we cannot exchange it, and in nearly every case the fit is an adjustment away. Send us:
your order number and the vehicle year, make and model
photos of the adjustments at both fenders
a photo of the underside of the hood showing the cam buttons on both sides
a photo of the hood closed, from the side, showing the gap you are fighting
The underside shot is the one customers forget, and it is usually the one that contains the answer.
Check both rods are equal
Before you conclude one side is out of range, measure both adjustment rods. They have to be set to the same length. Mismatched rods stop the two hinges sharing the load evenly, which is both why one corner will not come down and how the more serious failures start: bolts pulling through, threads stripping, rods shearing and brackets breaking.
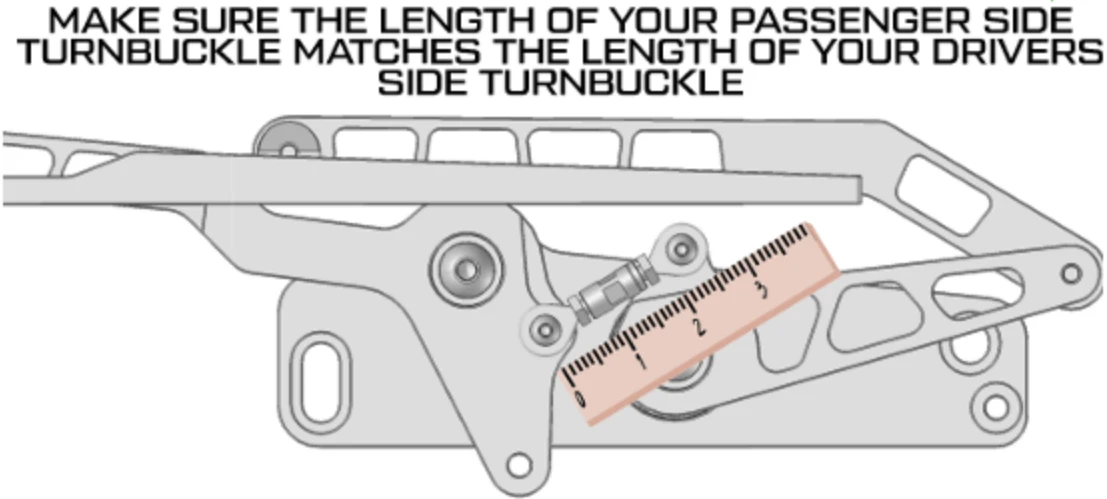
Measure both turnbuckles. The passenger side has to match the driver side.
It is also worth confirming that the distance between the OEM mounting holes matches your final measurement between the cam button bolts. If those disagree, the hinge is not sitting where the hood expects it to, and no amount of turnbuckle will fix that.
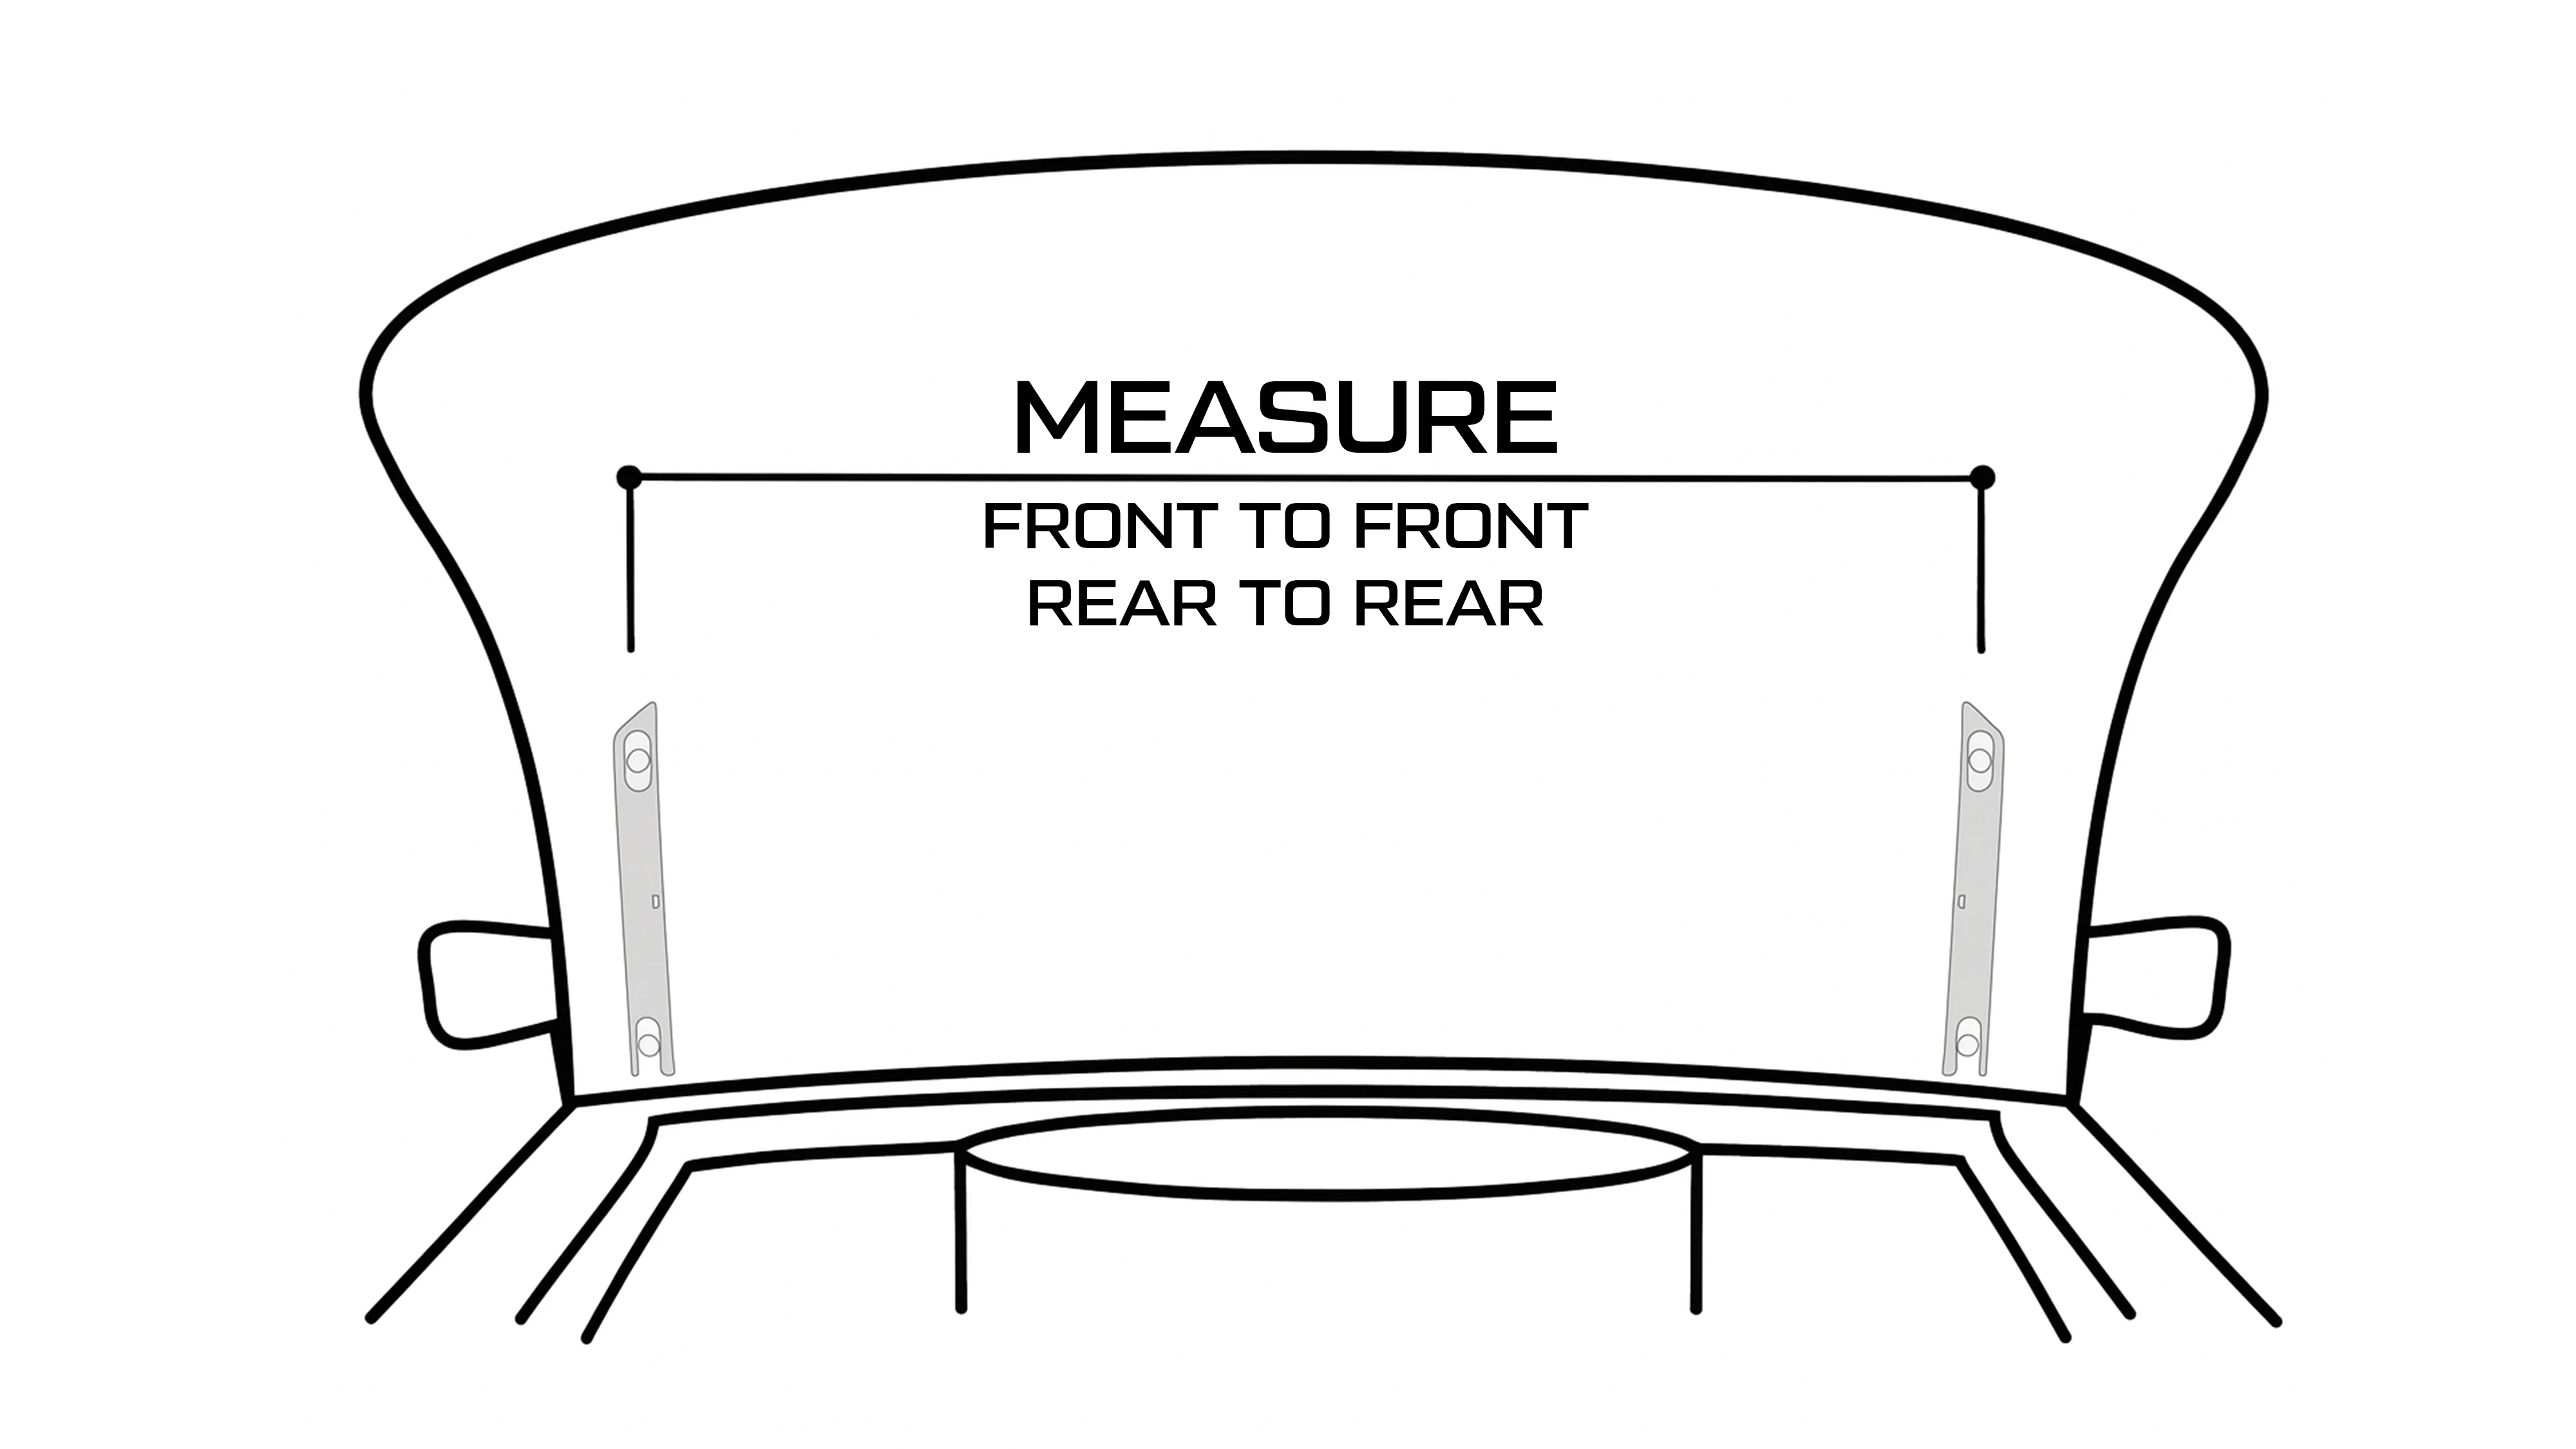
Measure front to front and rear to rear. If they do not match, the hinges are toed in or out.
Work in small steps
Each of these adjustments interacts with the others, so change one thing, ease the hood down, look, and change again. Full procedure and photos: Universal Hood Hinge Install Instructions.
Don’t force it
If the hood does not want to come down, stop. Forcing a hood onto a misadjusted hinge can buckle the hood, and that is a far more expensive problem than the gap you started with.
Watch it on video
Seeing the adjustments made on a real car is usually faster than reading about them.
CVF Hood Hinge Installation Tips — CVF Racing on YouTube
Why Billet Hood Hinges Are a Must — 1966 Chevelle Install and Setup Tips — CVF Racing on YouTube
Still need help? Our tech support team can get you pointed in the right direction.
Contact Support